FLRIG precooking configurations

In my last post, we discussed CAT control for N1MM over FLRIG, with the main positive (at least for me) being the ability to have a "double tap to load flrig for IC7300" and a "double tap to load flrig for x6100" (for example) on the desktop. No fussing around with configs, changing com ports, speeds, and other things while hooking up another radio.
Today, let me show you how I do it.
Step 1: Install FLRIG
If you do not have flrig installed already, do so. It's straight forward, just click next until you are done.
Step 2: Create a FLRIG shortcut
This step only applies if FLRIG did not already place one on your desktop. If it did, just copy it. If not, go to your FLRIG install location by searching for it in the taskbar and selecting "Open file location".
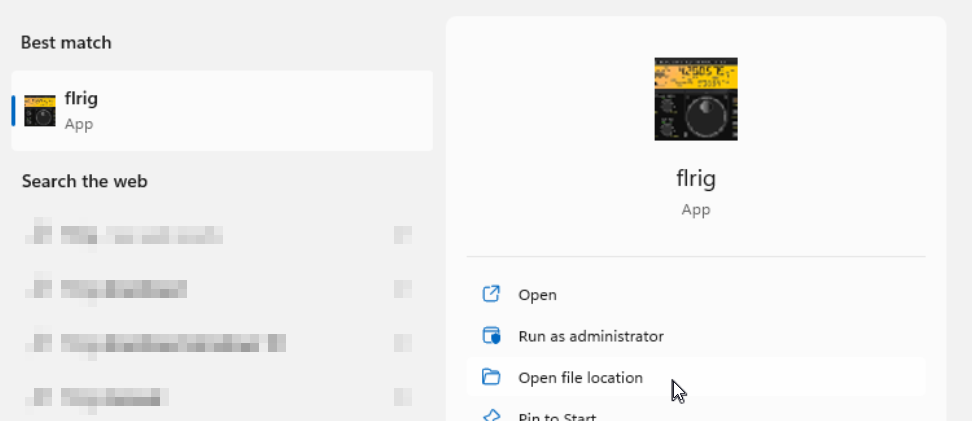
After that, right click flrig and selection "Send to" -> "Desktop (create shortcut)".

Step 3: Create directories to hold your precooked configs
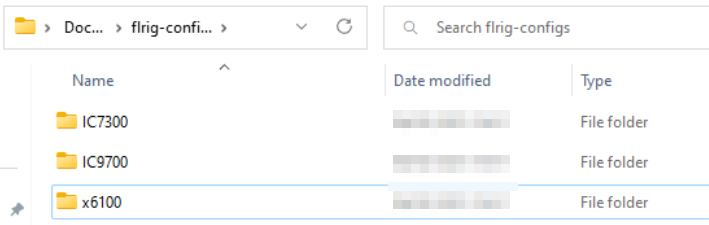
Create a folder where you will store your FLRIG configs. For me, I used my "Documents" folder. But any location is fine, really.

Inside that folder, create another folder for each rig you want to prepare configs for. For me, thats my IC7300, my IC9700 and my Xiegu x6100:
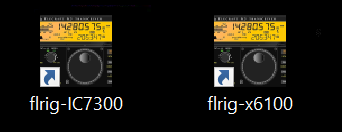
Step 4: Copy and rename the FLRIG shortcut for every rig you want to control
Like so:
Repeat the following steps for each rig!
(the following example will be for IC7300)
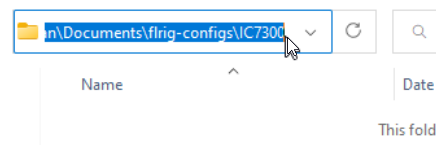
Step 5: Copy the path to your config directory from Step 3.
Left click on the "path" bar up top:
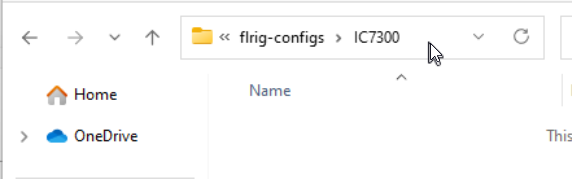
to reveal the full path. Copy that to clipboard.
Step 6: Change the properties of the shortcuts
Right click your IC7300 shortcut and choose properties.
After whatever already is already entered in the "Target" input box, likely something like "C:\Program Files (x86)\flrig-1.4.7\flrig.exe" (or whatever your current version may be), place a space, followed by "--config-dir", another space, followed by the copied path, enclosed with quotes.
After all is done, your "Target" should read as follows:
"C:\Program Files (x86)\flrig-1.4.7\flrig.exe" --config-dir "C:\Users\user\Documents\flrig-configs\IC7300"
Of course, both paths (other version for flrig + whatever you chose for config directory) could be different.
Spaces and quotes are important, as well as the double "-" in front of "config-dir". Without proper spacing and quoting, it will not work!
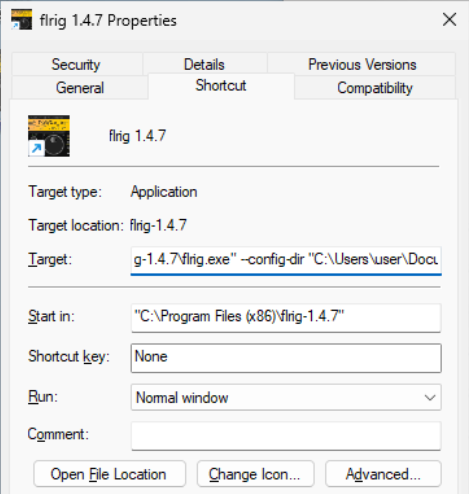
Click ok to save.
Step 7: Connect your radio.
Plug in USB, TNC or whatever you need to do to get CAT control.
Step 8: Open your shortcut and configure FLRIG.
Double click your shortcut, go to config, configure CAT control and test it.
Step 9: Close FLRIG
Just close the program.
Step 10: Repeat for each rig.
Repeat, starting at Step 5.
Step 11: Done!
Now your flrig stored your config to your IC7300-directory. If you start FLRIG using your IC7300-shortcut, it will autoload everything you need for that rig. If you use another shortcut instead, it will load up everything for that rig.
No more fuzzing around in config when changing the radio, just double tap and play radio!
73 and good DX, de Stefan, DB4SCW.